Followers

Showing posts with label rubberstamping. Show all posts

Tuesday, July 17, 2012

Inks and Such Challenge #12 at JDE!

Well it's Tuesday and time for another Anything Goes Challenge at Jackson's Digital Expressions.  This week it's the Inks and Such team that's up plus we have Bugaboo Stamps as a sponsor this week!  So some of the DT will be using their images.  Today I have an easel card using the Dress Forms V. digi.


Supplies used:  Floral paper by My Mind's Eye Howdy Doody "Beautiful" Roses, stamp sentiment by Verve, Jolee's hotfix crystals, Prismacolor pencils and Gamsol on the dress, Copics on the upper body, pop dots, yellow/ gray papers from stash.

So come join us this week at JDE with your Anything Goes entry, we are having a month long celebration!

Kathi  :)

Tuesday, July 10, 2012

I made myself something!

I don't know about you guys but I very rarely make myself anything.  Well the challenge at JDE is the color challenge to use red, blue and purple.  Also we are being sponsored this week by A Day for Daisies digi stamps.  I just love this image called Growing in a Snowglobe.  I decided to make something to hang on my office door, the finished size is 8 x 10.
The black and blue paper bases were cut from a banner file which was a free weekly set from Designs on Cloud 9.  The Scalloped border is a Spellbinders die with the Jolee's Hotfix crystals.  The ribbon is stiff and sparkly and was very easy to stamp on.  The letters are from a CTMH set called Chocolate Alphabet small.
I used Copics E00 and E000 for her skin and Prismacolor pencils and Gamsol for everything else, Stickles on her wings and center of flowers, I used PearlEx #673 interference violet inside the snowglobe (doesn't show in pictures though!)

Ok so here is my "goof".  I was almost done and below is the original border with the additional die used to cut the hearts and dots which was fine until I decided to to fill them with Stickles.  I was so not happy with the result and mad at myself for "ruining" and almost finished project.  I'm sure you've been there LOL!  Anyway I decided to cover it with another scalloped piece and added the Jolee's crystals.  I am much happier with the final result!  Whew! 


Linking to:  Under the Table and Dreaming Sunday Showcase
                     Sew Darn Craft Linky Party


Saturday, June 16, 2012

Yankees magnet and acrylic block tip!

I made a magnet for my husbands locker at work.  Mind you he works in Massachusetts...you know...Red Sox Nation!  Needless to say he's outnumbered there but he loves to torture them!  LOL!!  This is an old stamp set from Autumn Leaves and the ROCKS are letters from another license plate set and don't remember who made it!  I'm bad but it's old too!

Here is the back, I added some chipboard for support.  Stamp by Verve.

Ok so here's my tip.  I was looking for my really large acrylic block and can't find it...I rarely use it.  I was going bonkers looking when it finally hit me...I could use the embossing plate from my Cuttlebug!!  Duh!  Well it worked great!  And definitely large enough.  So don't waste $ on a large block just find something else to use  :)


I am entering this in Tammy's Scrapin Corners challenge this week which is #14 For the Boys.  And linking to The Sunday Showcase Party #106 and Made By You Monday.

Thanks for stopping by!!  Kathi

Monday, April 30, 2012

Card + soda bottle gift

Here's one of my quickie cards.  The card base (plaid and already scalloped) was a blank note card from Target I think.  PTI stamps used:  Birthdays by the Numbers and Big Birthday Wishes.


 And here's a quick way to package gifts.  This took me about 10-15 minutes to put together.

Supplies needed:  2 liter soda bottle
                            exacto knife
                            sticker paper or paper and double sided tape
                            filler like shredded paper or tissue
                            ribbon or bow

And because I was in a hurry the sticker paper wrinkled at the bottom...grrr...LOL
Step #1     Cut a "door" in the side of the bottle with the exacto knife.  So you will be cutting 3 sides,
                 do not cut a complete hole in the bottle.

Step #2    Put some filler in the bottle then add items and more filler so the items are snug and don't shift.

Step #3   Print your saying on the sticker paper or regular paper and cut it so it is larger than your opening
               in the bottle.  This is how you will hide your "door".

Step #4   Close the opening and place the paper over it to seal the items inside.

Step #5  Decorate with ribbon on the top and that's it!

Just be careful when putting your items in because the edges can be sharp!!  Advise your recipient to do the same!  If I had time I would have decorated the sticker paper more but considering it was a last minute gift and card it was ok.  And my daughter's friend liked it so that's all that mattered  :)  Little kids love these!  I actually used to mail the smaller soda bottles but that was years ago.  I would be too afraid to do that now...things tend to get "lost" too often now  :)

Have fun!
Kathi

Tuesday, March 6, 2012

Quick & Easy Birthday Cards & rubber stamp tip

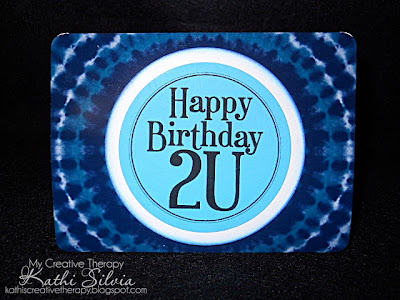
 Hi all!  Here are 3 cards I made for clients and staff at work.  I made 5 of each.  These are the cheap and easy cards I make using the 8 pack of blank cards for the base.  I think I had gotten all 3 packs from Michael's.
The birthday sentiment is a digi stamp from Bird's Cards she has some awesome images/sentiments and they're all free!  It was cut with a 3" punch then matted on the white circle which was cut with a circle Nestabilities then inked the edges with teal ink.
This rubber stamp was one piece but I wanted to stamp the phrase and present separately.  I've done this many times, just take an exacto knife and slice the portion of the stamp you want to remove.  Slowly peel the stamp from the block and place on another wood or acrylic block.  That's it now you have two stamps use together or or or not!
 And the last card is using a presents stamp by DeNami  I believe and I can remember who makes the Happy Bday stamp...and honestly I'm1:00 a.m. and I'm too lazy to go to the basement and look at it!  LOL!  But if you really want to know just email me and I'll let you know!  I went over the design with Crystal Stickles.

 Well thanks for stopping by!
Kathi

Sunday, January 22, 2012

Birthday card challenges!

Hi all!  Today I made a birthday card which I will be entering in two challenges.  First is Crazy 4 Challenges  which is a child's birthday card and then Birthday Sundaes which is anything birthday.


For this I used the Mickey Font cartridge.  I used the ticket feature cut at 2.5" and the Mickey #2 tag cut at 2".  I filled the 2 with Crystal Stickles.  I stamped the background with an old Delafield Stamp Co. star and embossed with sparkle EP.  I and cut the flag banner and stamped + embossed with the sparkle EP.  I don't know who made the HB stamps they are from a mini set.  And to finish it off I inked the edges of the card with black pigment ink.

Thanks for stopping by...again!  I've been busy, making up for lost time I guess  LOL!!